

.svg)


If you've never gone through a roof replacement before, the process can feel like a black box. You know you need a new roof. You've gotten a quote. You've signed a contract. And now you're wondering — what actually happens next? How long is this going to take? What's it going to look and sound like? What do you need to do to prepare? And how do you know when the job is done right?
These are the questions every DFW homeowner deserves clear answers to before a single shingle gets pulled off their home. A roof replacement is one of the largest investments you'll make as a homeowner — typically ranging from $8,000 to $25,000 or more depending on the size, pitch, and materials involved. Understanding the process from start to finish puts you in control and helps you recognize when things are being done correctly versus when corners are being cut.
This guide walks you through every stage of the roof replacement process as it happens with Timeless Roofing — from the initial inspection to the final walkthrough. No surprises, no mystery, no roofing jargon you have to decode on your own.
Every legitimate roof replacement in DFW starts with a thorough, professional inspection — and that inspection should happen before any conversation about materials, pricing, or scheduling.
At Timeless Roofing, the inspection covers every component of your roofing system, not just the surface-level shingles. We look at the condition of the existing shingles across every slope, the state of the underlayment, the integrity of the flashing around all penetration points, the drainage system, and the attic ventilation. We also check the decking — the structural layer beneath your shingles — for any signs of moisture damage, rot, or soft spots that would need to be addressed before a new roof goes on.
Everything we find is documented with photos and video. When the inspection is complete, we walk you through what we found in plain language so you understand exactly what condition your roof is in and why a replacement is the right call. If a repair would genuinely solve the problem, we'll tell you that too.
What you should do at this stage: Ask questions. Lots of them. A contractor who can't clearly explain what they found and why they're recommending what they're recommending is not someone you should be handing your roof to. A great inspection is also the foundation of a strong insurance claim if your replacement is storm-related — so the thoroughness of this step directly affects your payout.
Once the inspection is complete and you've decided to move forward with a replacement, the next step is choosing your materials. In DFW specifically, this decision matters more than it might in other parts of the country because of the climate demands your roof will face.
Here's a practical overview of the most common roofing materials for North Texas homeowners:
The most widely installed roofing material in the DFW area. Architectural shingles (also called dimensional or laminate shingles) are a significant upgrade over the older 3-tab shingles found on many DFW homes. They're multi-layered, which gives them better durability and a more textured, high-end appearance. Quality architectural shingles are rated for wind resistance up to 110 to 130 mph and carry warranties of 25 to 30 years. They're the most cost-effective option for most DFW homeowners balancing durability, appearance, and budget.
For DFW homeowners who deal with frequent hailstorms — which is most of them — Class 4 impact-resistant shingles are worth serious consideration. These shingles are manufactured with a reinforced polymer or rubber core that absorbs hail impact without cracking or fracturing. Class 4 is the highest impact-resistance rating available, defined by UL 2218 testing standards. Beyond the obvious durability benefit, many Texas homeowners who upgrade to Class 4 shingles qualify for a meaningful discount on their homeowner's insurance premium — which can offset a portion of the upgrade cost over time.
Metal roofing has grown significantly in popularity across North Texas in recent years, and for good reason. Metal roofs are exceptionally durable — with lifespans of 40 to 50 years or more — highly resistant to hail, wind, and fire, and their reflective properties make them excellent for energy efficiency in the Texas heat. They represent a higher upfront investment than asphalt shingles, but the long-term math often works in their favor for homeowners planning to stay in their home for many years.
What you should do at this stage: Don't just ask what material the contractor recommends — ask why. The right material for your home depends on your budget, how long you plan to stay in the home, your insurance policy, and your neighborhood's aesthetic standards. A good contractor walks you through the tradeoffs honestly rather than defaulting to whatever is easiest for them to install.
For a large percentage of DFW roof replacements, the driver is storm damage — and that means the insurance claim process happens before or alongside the material selection and scheduling steps.
If your replacement is insurance-related, here's what that process looks like when you work with Timeless Roofing:
After the inspection, we help you file your claim with thorough photo documentation of all damage. When your insurance company schedules an adjuster to inspect the property, we are there with you. This is critical — having your roofing contractor present during the adjuster visit ensures that every point of damage is properly documented and nothing gets overlooked. Adjusters are often handling dozens of claims at once, especially after a major DFW storm event, and a knowledgeable contractor who can walk the roof alongside them makes a measurable difference in the completeness of the estimate.
Once the insurance estimate comes in, we review it with you line by line. If items are missing or undervalued, we help you request supplements. Only after the insurance scope is finalized and approved do we move into the scheduling and build phase.
What you should do at this stage: Do not let a contractor pressure you into scheduling the build before your insurance claim is resolved. The order of operations matters. Inspection first, insurance scope confirmed, then build.
In the days leading up to your roof replacement build day, there are a few things you should do to prepare your home and make the process as smooth as possible.
Move vehicles away from the house. Your driveway and the area immediately around your home will be an active work zone on build day. Shingles, nails, and debris fall from the roof throughout the tear-off and installation process. Getting your cars away from the structure protects them from incidental damage.
Protect items in your attic. A roof replacement involves significant vibration — nails being driven, old materials being stripped, materials being moved across the roof surface. Anything stored in your attic, especially fragile items, should be covered or temporarily relocated. Dust will settle into the attic space during the process.
Take wall hangings and fragile items off interior walls. The vibration from roof work can be felt throughout the home. Pictures, mirrors, and fragile decorative items on walls — particularly on upper floors and near the roofline — are worth taking down or securing temporarily.
Let your neighbors know. This is just courtesy — a roof replacement is loud. A quick heads-up to adjacent neighbors about the build date is a small gesture that goes a long way.
Arrange for pets and young children to be away from the home if possible. A professional crew works efficiently and professionally, but a roof replacement is a loud, busy environment. If you have dogs who stress at noise or young children napping on a schedule, making alternate arrangements for build day makes the day easier for everyone.
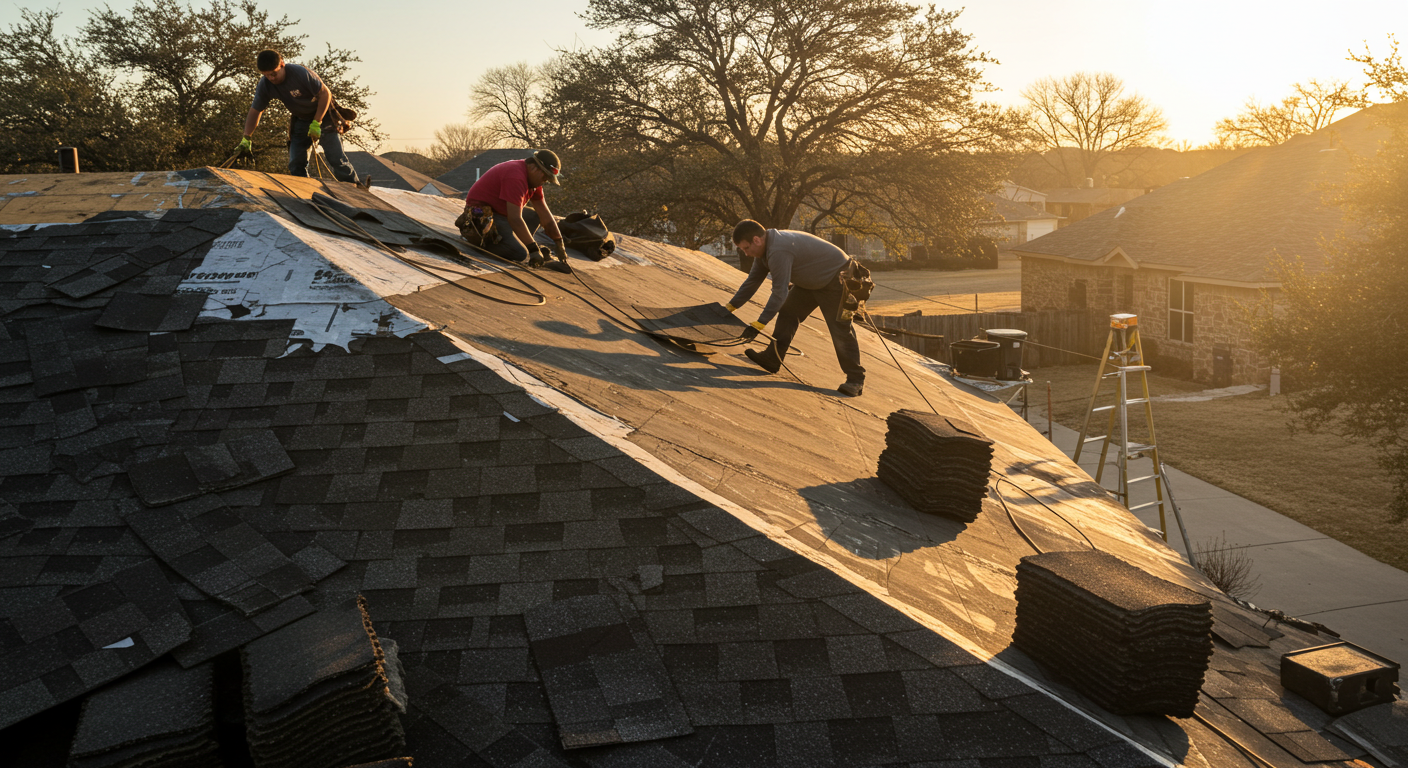
Build day is where the work gets done, and for most residential roof replacements in DFW, the entire job is completed in a single day. Larger or more complex roofs may extend into a second day, but the vast majority of standard-size DFW homes are fully roofed in one build day.
Here's what the process looks like from start to finish:
The morning starts with material delivery. Your shingles, underlayment, flashing, drip edge, and all other components arrive — typically stacked onto the roof surface or staged in the driveway — before the crew begins work. At Timeless Roofing, we're on site from the start of the day. You won't be wondering who's on your roof or whether the right materials showed up.
The existing roofing system is completely removed down to the deck — every layer of old shingles, the old underlayment, and all old flashing. This is the loudest part of the process and typically the most visually dramatic. Torn-off material is collected and loaded into a dumpster or haul-away trailer continuously throughout the day.
Once the old materials are off, the decking — the structural wood layer that your new roof will sit on — is fully visible and inspected. Any sections showing rot, soft spots, or structural compromise are replaced at this stage. This is a step that can't be skipped or deferred. A new roof on damaged decking won't perform the way it's supposed to. At Timeless Roofing, we document any decking repairs with photos so you can see exactly what was found and what was replaced.
Before a single shingle goes down, a layer of protective underlayment is installed across the entire roof deck. Underlayment acts as a secondary moisture barrier — a critical layer of protection in a climate like DFW's where wind-driven rain and severe storms put constant pressure on the roofing system. The type of underlayment used matters, and it should be specified in your contract.
Metal drip edge is installed along the roof edges to direct water properly into the gutters and away from the fascia. New flashing is installed around every penetration point — every chimney, vent stack, pipe boot, skylight, and roof valley. Flashing is one of the most common sources of roof leaks, and proper flashing installation is one of the most important indicators of quality workmanship.
The new shingles are installed across the entire roof surface according to the manufacturer's specifications — proper nail placement, proper overlap, proper staggering of courses. The ridge cap is installed last, sealing the peak of the roof. This is where the craftsmanship of the crew becomes visible, and it's why working with an experienced local contractor matters.
When installation is complete, the crew performs a full cleanup of the property. All old materials, packaging, and debris are collected. Critically — a magnet is run across every area of your yard, driveway, and landscaping to collect fallen nails. This step matters enormously if you have children or pets. At Timeless Roofing, we take nail cleanup seriously. Our customer reviews reflect this — and it's something we're proud of.
A roof replacement isn't done when the last shingle goes down and the crew packs up. It's done when the homeowner has walked through the completed job and confirmed that everything was done right.
At Timeless Roofing, we do a final walkthrough with every customer before we consider the job closed. We walk the perimeter of the property, review the roofline, check the cleanup, and go over the documentation package — which includes photos of the completed work, the materials used, and any decking repairs that were made.
You receive a copy of your warranty documentation — both the manufacturer's material warranty and the workmanship warranty from Timeless Roofing. You should have both in hand before anyone leaves your property.
If your replacement was insurance-related, the final documentation package we provide is also what your insurance company needs to release the final depreciation payment. We help you submit this promptly so you're not waiting weeks to receive your final check.
What you should look for at the final walkthrough: Clean, straight ridgeline. Uniform shingle appearance with consistent overlap. No visible gaps or inconsistencies around flashing points. Clean gutters and downspouts. No debris in the yard or landscaping. All penetration points properly sealed.
From initial inspection to completed build, here's a realistic timeline for a DFW roof replacement:
From first call to completed roof, most DFW homeowners are fully roofed within 3 to 6 weeks. Insurance-related replacements may vary depending on how quickly the insurer processes the claim.
Most roofing companies in DFW operate at scale. They have large crews, multiple jobs running simultaneously, and a project manager who may or may not have been to your house before build day arrives.
At Timeless Roofing, we're owner-operated and hands-on by design. The same person who inspected your roof is the same person who meets your adjuster, selects your materials with you, shows up on build day, and walks the completed job with you at the end. You're not a job number — you're a homeowner who trusted us with one of the most significant investments in your home, and we take that seriously.
That's the standard every DFW homeowner should expect. And it's exactly what we deliver.

Ready to move forward with your DFW roof replacement — or just want to know where your roof stands?
At Timeless Roofing, we walk you through every step of the process with full transparency, hands-on involvement, and zero pressure. From the first inspection to the final walkthrough, you'll always know exactly what's happening and why.
Schedule your free roof inspection with Timeless Roofing today and let's get your home protected the right way.

.svg)

.svg)
.svg)
.svg)